Keeping hair healthy has always been my number one goal as a licensed professional. One thing I recommend to clients and everyone is to protect your hair at night. For natural curly’s and heat tool users this is especially important. Silk and satin bonnets have been around for years. The ones sold in stores typically don’t last very long plus they are not cute lol! The more stylish ones that are higher quality can be expensive to buy.
I would like to share with you a simple large satin bonnet DIY. This bonnet is versatile, it has corners so you’re able to tie it in a bow or you can have the corners just hang down for a different look. This doesn’t require any advanced sewing skills. You can sew it by hand or machine. I will be using a machine since it is much faster.
*Note: I have tried this with glue (e600 and fabric glue). While it can be done using the same steps. I would not recommend it because the glue tends to leave a residue that doesn’t look as nice. Sewing also holds up in the wash much better. If you absolutely don’t want to sew, try using glue. It “can” work just make sure the glue has set before moving on to the next step.
Materials needed:
2 Types of Material (one being satin for the inside) (1 yard of each)
Scissors
Elastic (your choice of size)
Measuring Tape (optional)
Needle and Thread (to hand sew) or Sewing Machine
Safety Pin
Iron (optional)
Satin bonnet steps
1. Start out by taking both yards of fabric and make sure they are even. (You want a square or rectangle type shape)
You can use measuring tape to make sure each piece of fabric is the same size.
2. Place each piece of material on top of each other making sure to keep the patterns on the inside (facing each other).
3. Now that they are placed on top of one another sew them together leaving an opening large enough to put elastic through and to pull the material right side out.
4. After sewing the fabrics together, cut any extra fabric by the hem then pull the fabric right side out. Tuck the extra fabric from the opening inside.
5. This step is optional. Iron any wrinkles out of the fabric.
6. Now that the bonnet is turned right side out, sew a hem on the perimeter of the bonnet. Make sure you don’t sew over the same opening that you pulled the fabric through. You need to be able to place the elastic inside.
Later, you will sew up that opening.
Sewing a space for elastic
7. The hem is sewn all around the bonnet. Now it is time to sew 2 parallel lines so that the elastic can be placed inside the bonnet. Depending on the size of elastic you choose, sew the lines about the same width of the elastic.
You want to sew the lines around the bonnet making sure to stop sewing at the previous opening in step 3.
8. Start sewing about 2 inches away from the hem so that you get a ruffle effect on the end of the bonnet.
9. After each line has been sewn, thread the elastic through the opening.
It helps to use a safety pin at the beginning of the elastic so you can push it through that tunnel much easier.
10. Once the elastic is threaded through pull it slightly until the bonnet starts to gather. Do this until your preferred size.
Keep in mind it will stretch out a bit. Don’t make it too tight or loose.
Place it on your head to measure easier.
11. Now that you have the perfect size, tie a knot on the elastic and cut off any excess elastic.
12. Fold the fabric inside by the opening and close up the opening by sewing along the existing lines.
Connect each line until each opening is closed.
You may need to stretch the bonnet out a bit to make sure each line is closed properly.
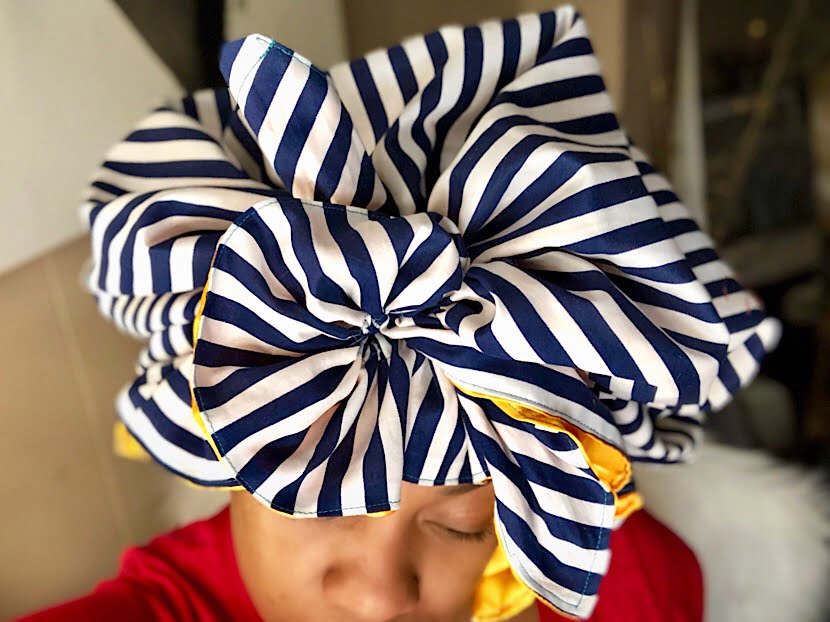
There you have it! Your satin bonnet is finished. There are so many cool things you can do to thing bonnet. Add jewels, pearls or patches. Get creative!
Here is a video for visual reference that shows you how I created my satin bonnet. Check it out!
Thanks for hanging out today!
XO Terreana
6 thoughts on “Satin Bonnet DIY for Natural Hair | How to Make a Satin Bonnet at Home”
Lovely
Thank you
Terreana, do you sell your bonnets? If so for how much?
Hi! At this time I do not sell them.
I wish you can demonstrate how to tie the bow. I like this method better than the circular cut!
If you view the video on YouTube I link to the video where I tie the bow. Hope that video helps.